You might have been looking for the developer grail like I did recently :
- hack away your code
- commit
- have continuous integration server perform all automated tests on a virtual machine and tags your code as "good to push on production" (or for the most crazy adventurous, having your code pushed to prod)
You probably looked at the most fashionable way to achieve this and ended up lured by the charms of Docker and Jenkins. Before diving into details, a quick primer on why those tools were suitable for me.
Continuous integration with Jenkins
Continuous integration is itself is a must have if you want to sleep at night after a late deployment. After all, our customers are always expecting their needs to be fulfilled immediately, whether it is a trivial css fix or a massive backend rewrite with a huge risk of regression.
Thanksfully the all bunch of automated tests we (should) write are meant to mitigate those regression, and a continuous integration service played all of them and bugging us only when something's fishy is good for the productivity (let the machine do the boring, repeatitive, tasks of playing and checking the tests results) and for the confidence (no mail, no failure, well, unless your mail server is crashed and test failures are accumulating for weeks, good luck with that :)
For my CI software, I needed something that was self hosted, libre, preferably packaged under debian and using python.
Those requirements basically let me the choice between 2 contenders: Jenkins and buildbot. But as the somewhat rigid project approach of Jenkins were fitting my needs and I knew it beforehand, I gave a quick glance at buildbot which seemed to require much work to cover for its lesser integration ecosystem.
So, here we go with jenkins, setup and hosted behind a reverse proxy from home.
So far, so good, let's move on the virtualization part.
Google is not (always) your friend
At this point, it's time to check more in detail the promising Docker integration plugin with Jenkins.
As I read through the page, I notice a small change in how docker would be started (adding a tcp port to listen on), some instructions on how to create a docker image suitable to be driven by Jenkins later edited to point to a clonable premade image.
The docker integration plugin is a cloud provider plugin. Just like there are some to integrate jenkins builds with "physical" cloud providers (Amazon EC2, Digital Ocean, ...), this plugin aims to provision docker image on the fly as they are needed to start slaves.
Unfortunately for me, I didn't manage to get it working and while I was skimming through docker and jenkins documentations to make this plugin works, one point of the docker documentation attracted my attention : docker daemon has to run as root, like any virtualization system which potentially requires full filesystem access. But as we had to open a tcp port to access the REST API of docker, we somewhat allowed anyone capable of accessing the docker tcp port to have some root access to my server. Ugh, even with a tcp socket bound to localhost, it means that any local user on my server could escalade to root :/
That's precisely why docker switched to unix socket by default since version 0.5.2, which allows for unix permission to be used to restrict access to docker and its "dreaded" root privileges.
Back to square one ?
Before spending too much time into a solution which would expose my server to root escalation for any unprivileged user (which is the risk explaining that docker is recommended to be ran on a seperate machine), I stepped back and wondered if another solution to integrate docker and jenkins wouldn't be possible; a solution not requiring exposing a tcp port.
After all, Jenkins is meant to be flexible regarding the slave launching and docker also has several options to be started, let's try to mix them without involving java shortcoming regarding unix sockets.
Not so dumb slaves
Jenkins can manage nodes which are named "dumb slaves", when jenkins doesn't integrate tightly with a node (no provisionning, physical machines or external virtual machines, like in our case).
Docker also has a convenient "run" subcommand which could be used to start the slave jar.
If you want to create your own node, you can either pull the image I'm using or creating yours. In either case, you can later update your docker image to install business dependencies for the projects you plan to configure in jenkins.
Grabbing a premade image
If you don't care about the specifics, you can simply pull the image like the one I prepared for me, it's zeograd/jenkins-slave, which you can pull via
- olivier@shaihulud:~$ docker pull zeograd/jenkins-slave
Preparing a slave docker image
For the most adventutous copy-pasters, you can easily enable a jenkins slave by adding a Java jre and the jenkins slave.jar to an existing image.
In my case, I started with a debian image, on which I installed openjdk and using curl to download slave.jar from my jenkins installation :
- # start by pulling a base image
- olivier@shaihulud:~$ docker pull debian
- debian:latest: The image you are pulling has been verified
- 511136ea3c5a: Already exists
- f10807909bc5: Already exists
- f6fab3b798be: Already exists
- Status: Image is up to date for debian:latest
-
- # start it interactively
- olivier@shaihulud:~$ docker run -ti debian /bin/bash
-
- # inside your docker image, download a jre and curl
- root@483c8f3bce7f:/# apt-get update && apt-get -y install openjdk-7-jre-headless curl
-
- # installation ensues
-
- # create a directory and download your slave.jar into /root/bin/slave.jar
- root@483c8f3bce7f:/# mkdir /root/bin && curl -k -u <user> https://<jenkins host>/jenkins/jnlpJars/slave.jar -o /root/bin/slave.jar
At this point, we can test that we can run the slave.jar from inside the docker image. We expect to see an error message about starting the slave agent interactively (we need to quit with control-C). Other errors should be investigating before going further.
- root@483c8f3bce7f:/# java -jar /root/bin/slave.jar
- WARNING: Are you running slave agent from an interactive console?
- If so, you are probably using it incorrectly.
- See http://wiki.jenkins-ci.org/display/JENKINS/Launching+slave.jar+from+from+console
- ^C
When everything works, we can save this container as image
- root@483c8f3bce7f:/# exit
-
- # list latest container
- olivier@shaihulud:~$ docker ps -l
- CONTAINER ID IMAGE COMMAND CREATED STATUS PORTS NAMES
- 483c8f3bce7f debian:latest "/bin/bash" 29 minutes ago Exited (1) 2 minutes ago fierce_fremen
-
- # commit it into a docker image
- olivier@shaihulud:~$ docker commit 483c8f3bce7f jenkins-slave
-
- # you can then admire your brand new image
- olivier@shaihulud:~$ docker images
- REPOSITORY TAG IMAGE ID CREATED VIRTUAL SIZE
- jenkins-slave latest 1c999a144be7 About a minute ago 265.1 MB
- debian latest f6fab3b798be 7 weeks ago 85.1 MB
You can finish with an ultimate test, by testing that you can also start the slave agent from outside docker.
- # we start the slave.jar from outside and expect the interactive error message
- olivier@shaihulud:~$ docker run -ti jenkins-slave java -jar /root/bin/slave.jar
- WARNING: Are you running slave agent from an interactive console?
- If so, you are probably using it incorrectly.
- See http://wiki.jenkins-ci.org/display/JENKINS/Launching+slave.jar+from+from+console
- ^C
Configuring jenkins
At this point, let's create a jenkins node.
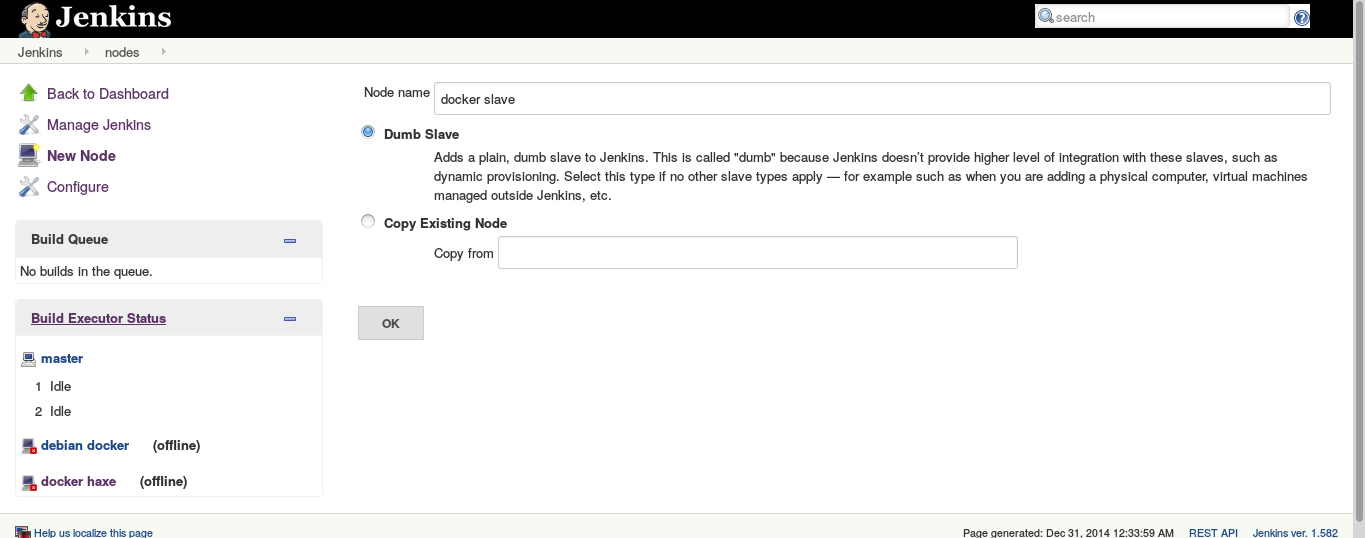
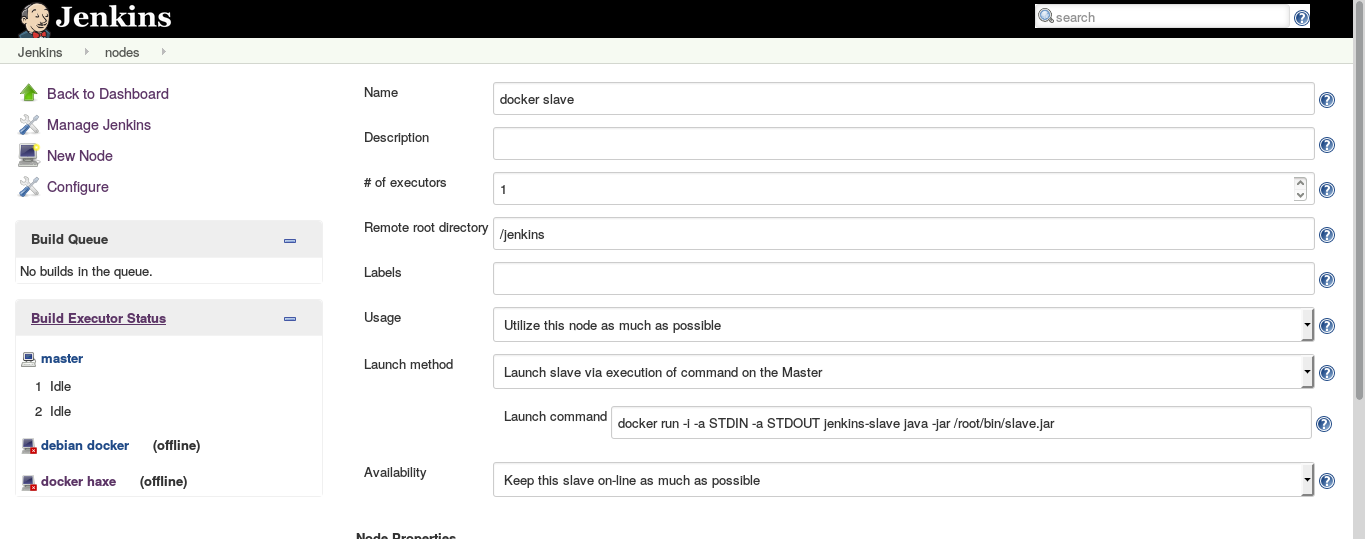
The only specifics points to take care are the "launch method" and the related "launch command".
Launch method must be set to "Launch slave via execution of command on the Master".
Launch command must be set to "docker run -i -a STDIN -a STDOUT jenkins-slave java -jar /root/bin/slave.jar".
Basically, we told jenkins to start our docker image with the slave agent whenever this node must be brought online. Jenkins uses the stdin/stdout to communicate with the slave agent, so we start docker with the -i flag to keep stdin open. We also attach stdin and stdout via -a STDIN -a STDOUT, then we specify the docker image to start (jenkins-slave in our case) and the java command which actually starts the slave agent (java -jar /root/bin/slave.jar).
Am I done yet ?
Pretty much, yes. You now have a node which is usable like any other jenkins node, but actually is a docker container with all the advantage of having a very separate and easy to manage slave environment (as a bonus, you can share host and guest directories to ease git checkouting or artifact retrieval).
Unlike the cloud docker plugin, there is no open tcp port so you have a secure environment (as long as your jenkins is secured) and, in my case at least, a working solution to integrate docker and jenkins.
I feel like I'm missing some of the provisionning plugin features as I have to create a jenkins node for every docker image I could use but for a small to moderate use of jenkins, that's probably fine.
Feel free to criticize and share your own setup.