Ink bleeds are commonly used for transitions and reveals in video editing.
You can find nice ones online either for free or paying. But sometimes you need ink bleeds which are more suited to your needs (be it resolution, shape, timing, ...) and you have to rely to generate yours.
If you can't afford time and materials to record an actual ink droplet over a thin glass layer, you can rely on CG to create them.
There are some tutorials to do so on proprietary software and some great ones to simulate a ink drop in blender. But neither combine the 2D ink bleed generation with libre software.
The nearest I could find is an answer on Stack Overflow which presents nice ideas which I'd like to extend in this post.
Requirements
To achieve one of the ink bleeds shown in the video above, you'll need to use a decent blender release (2.78 at this time but should work with some older ones and probably newer ones) and enough knowledge to navigate a bit (moving objects, using fcurves, rendering animations, ...)
Principles
As shown in the Stack Overflow answer, you can use height maps to create an effect similar to a spreading stain. We'll reuse it and introduce some fractals to simulate ink spread physics.
To add this fractal element, we'll abuse the "ANT landscape" plugin which generate terrains. We'll then display progressively the terrain along its local Z axis.
Seasonned blender users will probably skip straight to their own interpretation of this approach at this point, but if you want more detailed instructions, keep reading :)
Plugin setup
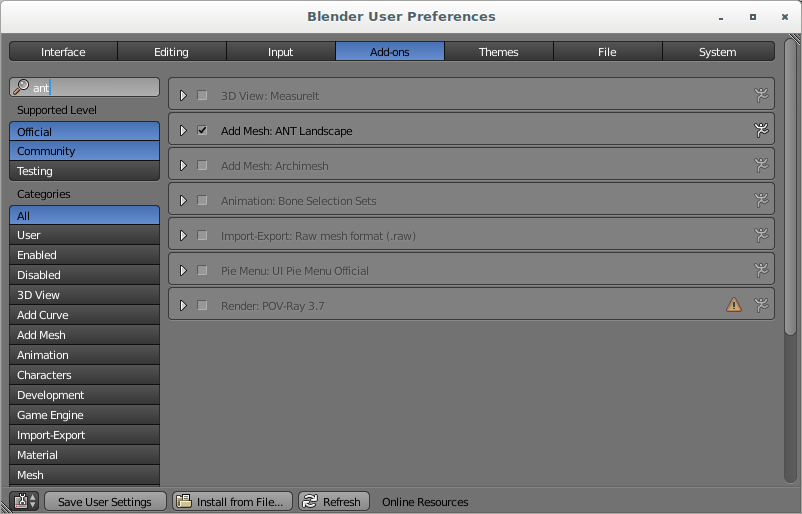
We'll just enable the "ANT landscape" plugin which is bundled with blender but disabled by default.
Reach the User preferences (CTRL-ALT-u) and in the "Add-ons" tab, search for "ant" and enable the "ANT landscape" plugin. If you want the change to be permanent, don't forget to click "Save User Settings" down there.
Camera and lightning
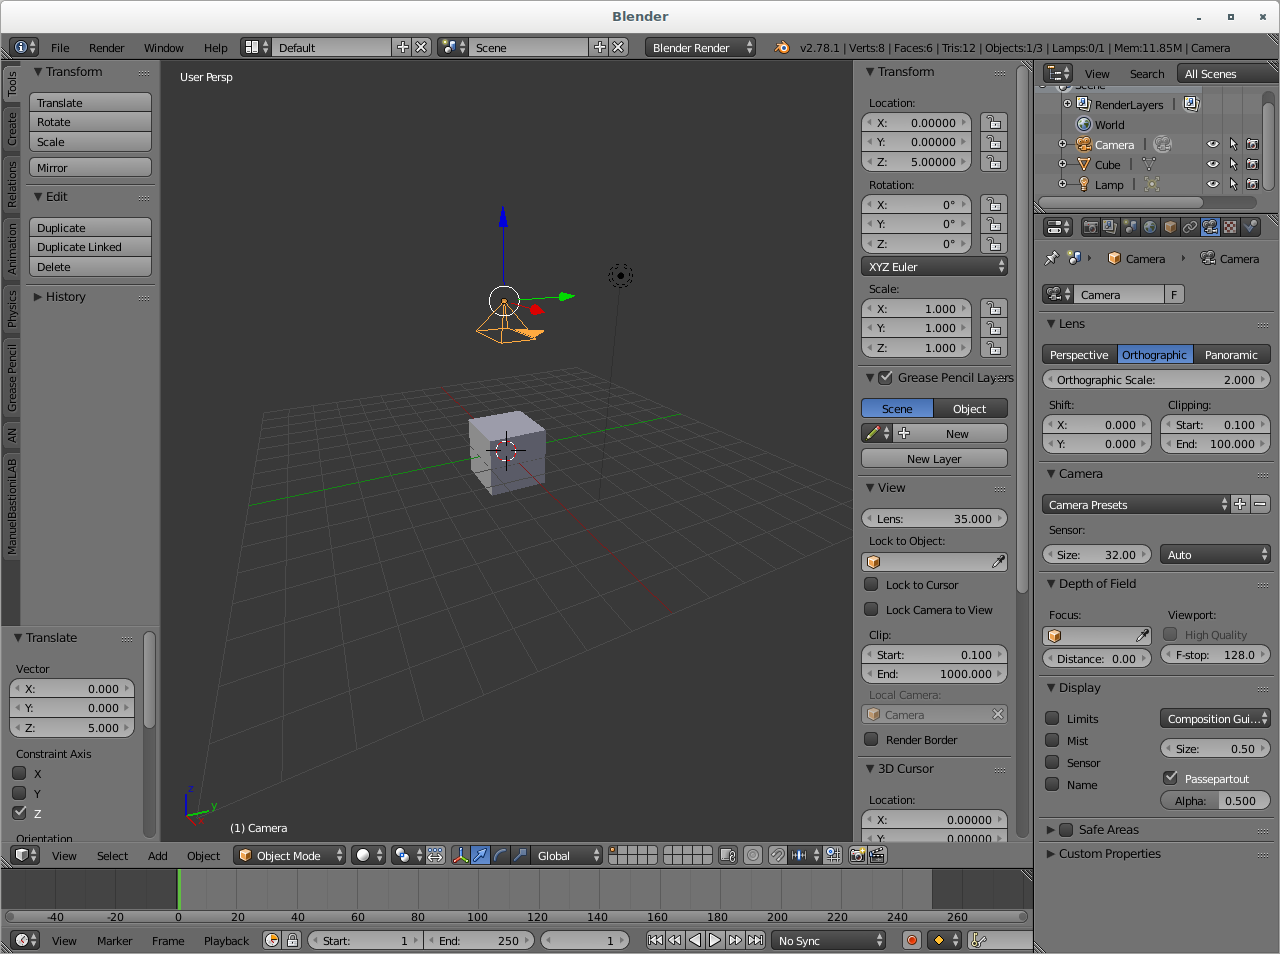
We're aiming for a 2D like result so we'll configure the camera as a regular 2D camera in blender.
Select it and reset its rotation and position (ALT-g, ALT-r) then move it a bit away in Z (g z 5). Finally, on its "camera" tab, switch to "Orthographic" and set the "Orthographic scale" to "2".
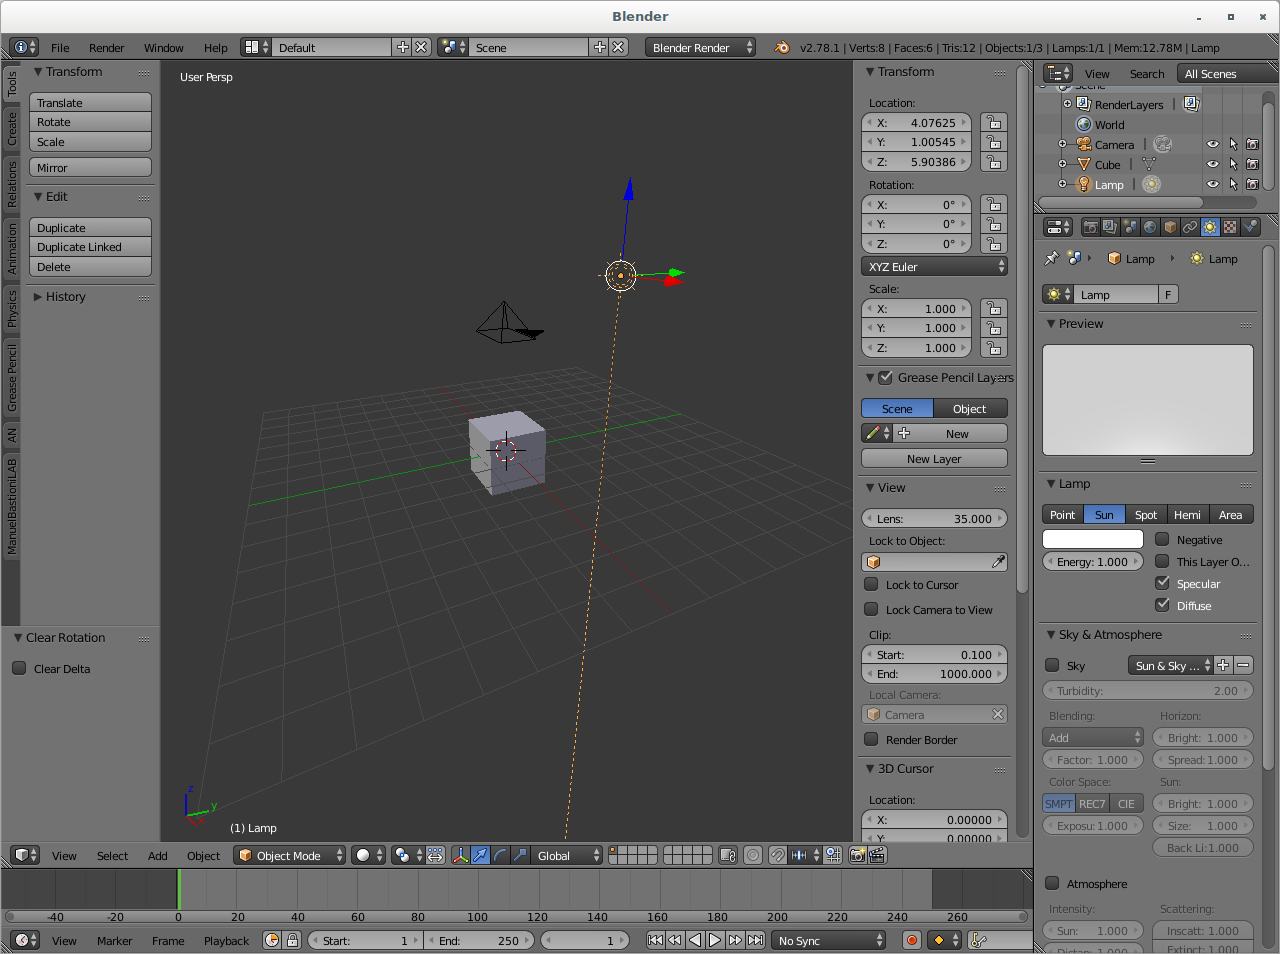
As for the lightning, pick the default lamp, makes it a "sun" on its light tab and reset its rotation (ALT-r). This way, we don't have any cast shadows and keep the 2D illusion.
Modelling
For once, we'll actually use the default cube ! Just move it away for now, we'll bring it back later.
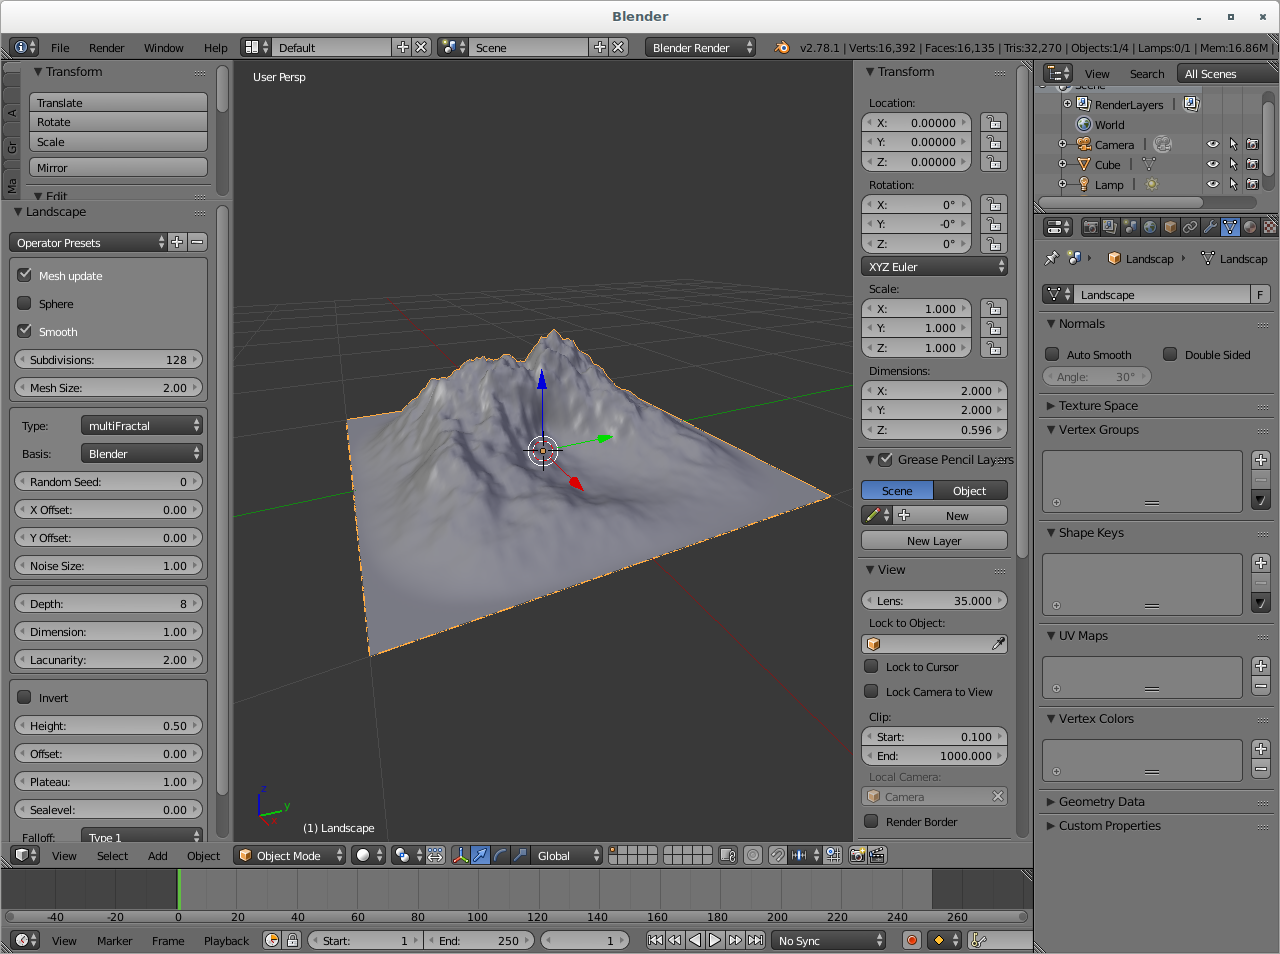
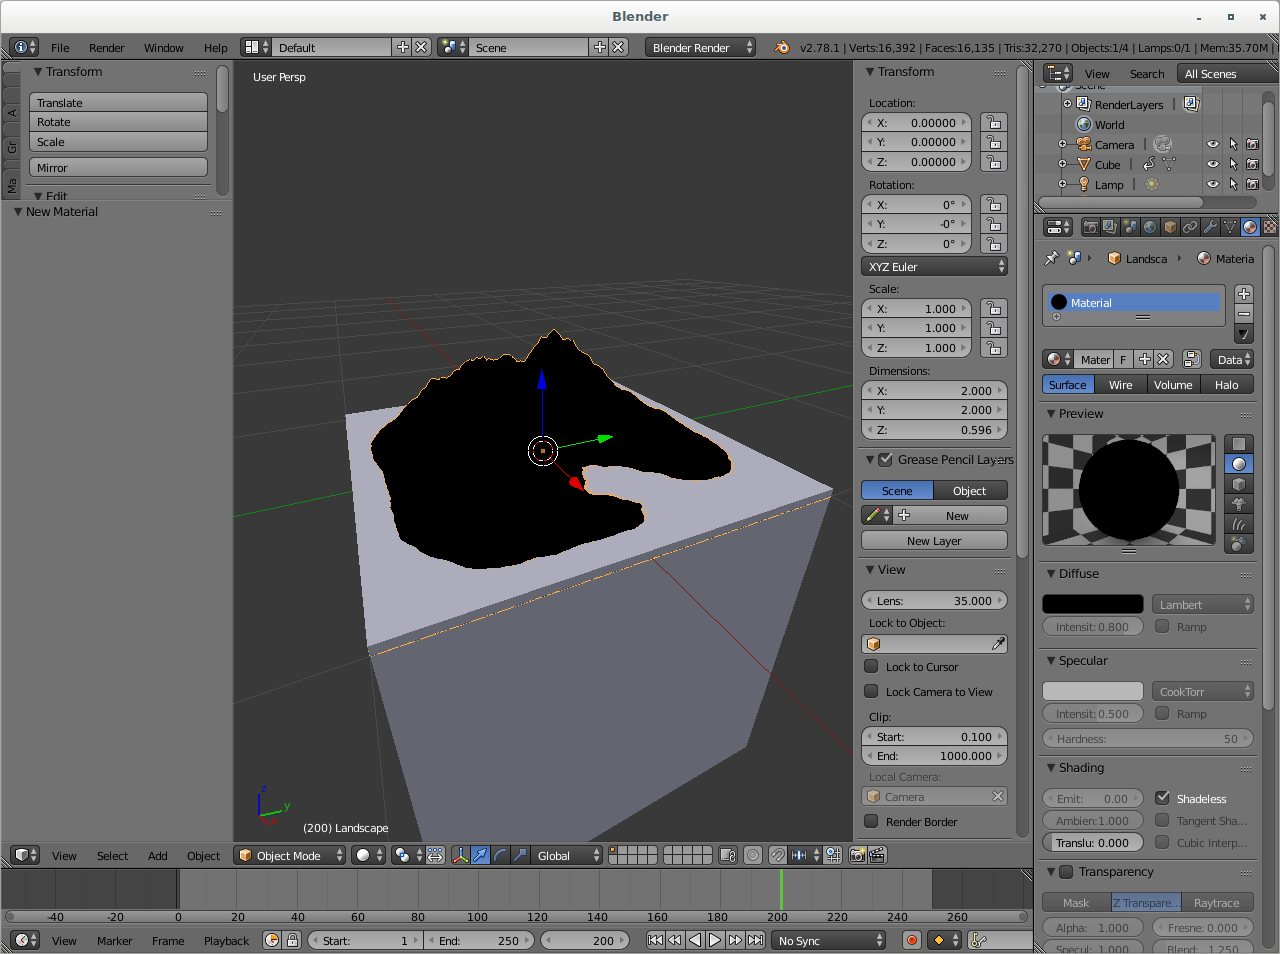
Then we'll create a landscape to introduce our fractal content. With the 3D cursor still on (0,0,0) add a new "ANT
landscape" (SHIFT-a > Mesh > Landscape).
Many settings appears. For now, leave the defaults excepted for the "subdivision" setting which you'll bump
accordingly to your target resolution (for 1080p, you may pick 1024 for instance). Leaving the subvision too low may
affect the sharpness of your ink bleed (but it will be much more CPU and RAM friendly). You can obviously play with
them to change the final result and the demo video above shows some of the most important ones.
Bring back the default cube to the center (ALT-g) and move it along Z to just hide your landscape (g z and move your mouse).
Animate your cube
Ensure you're at frame 1 and insert a location keyframe on your cube (i). That way, when you start your animation, the landscape is fully hidden.
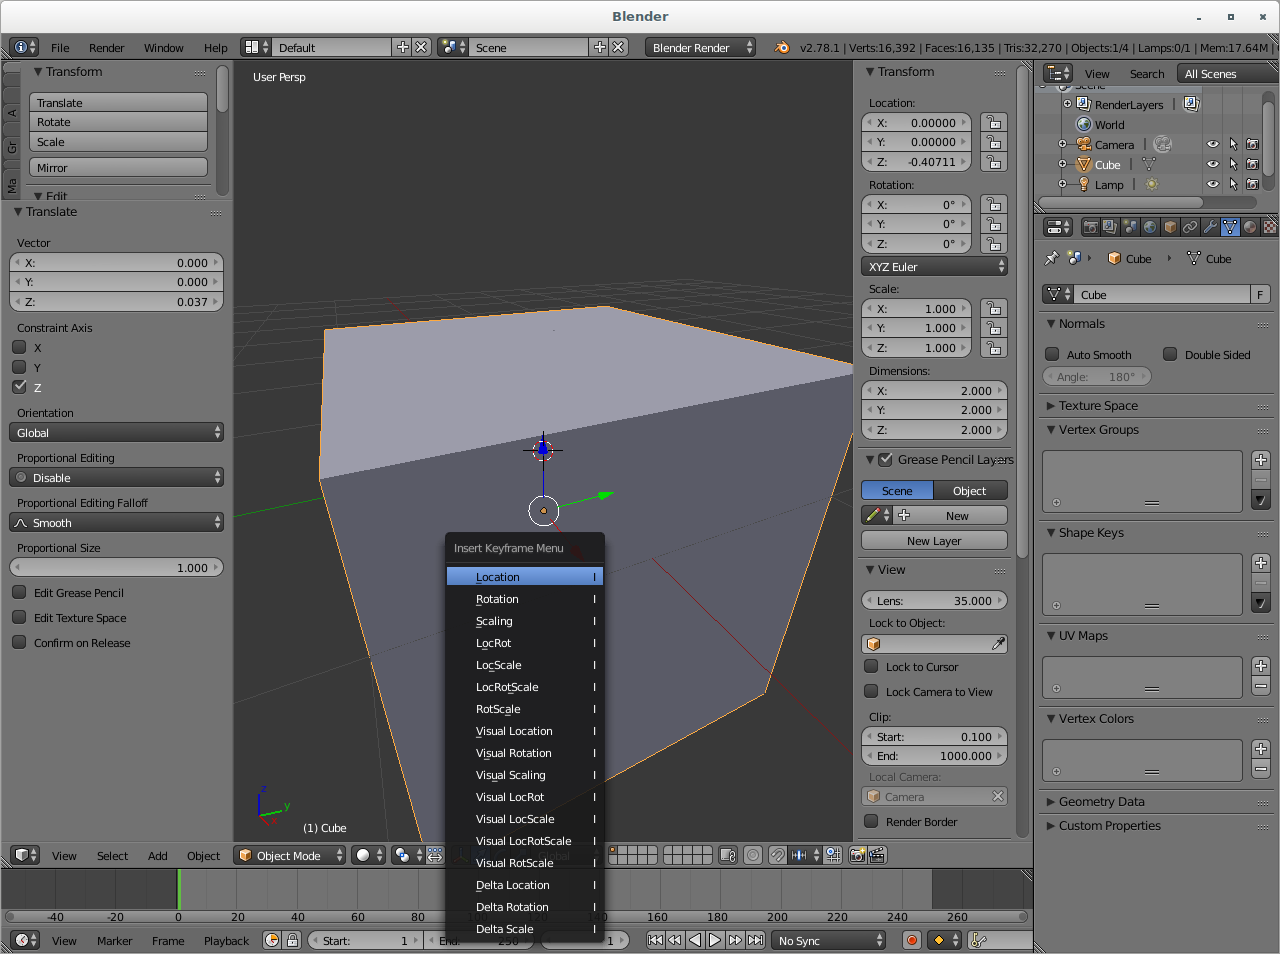
Move your cube along Z to just reveal your landscape (g z and move your mouse). Move the timeline to your last frame and insert a location keyframe on your cube.
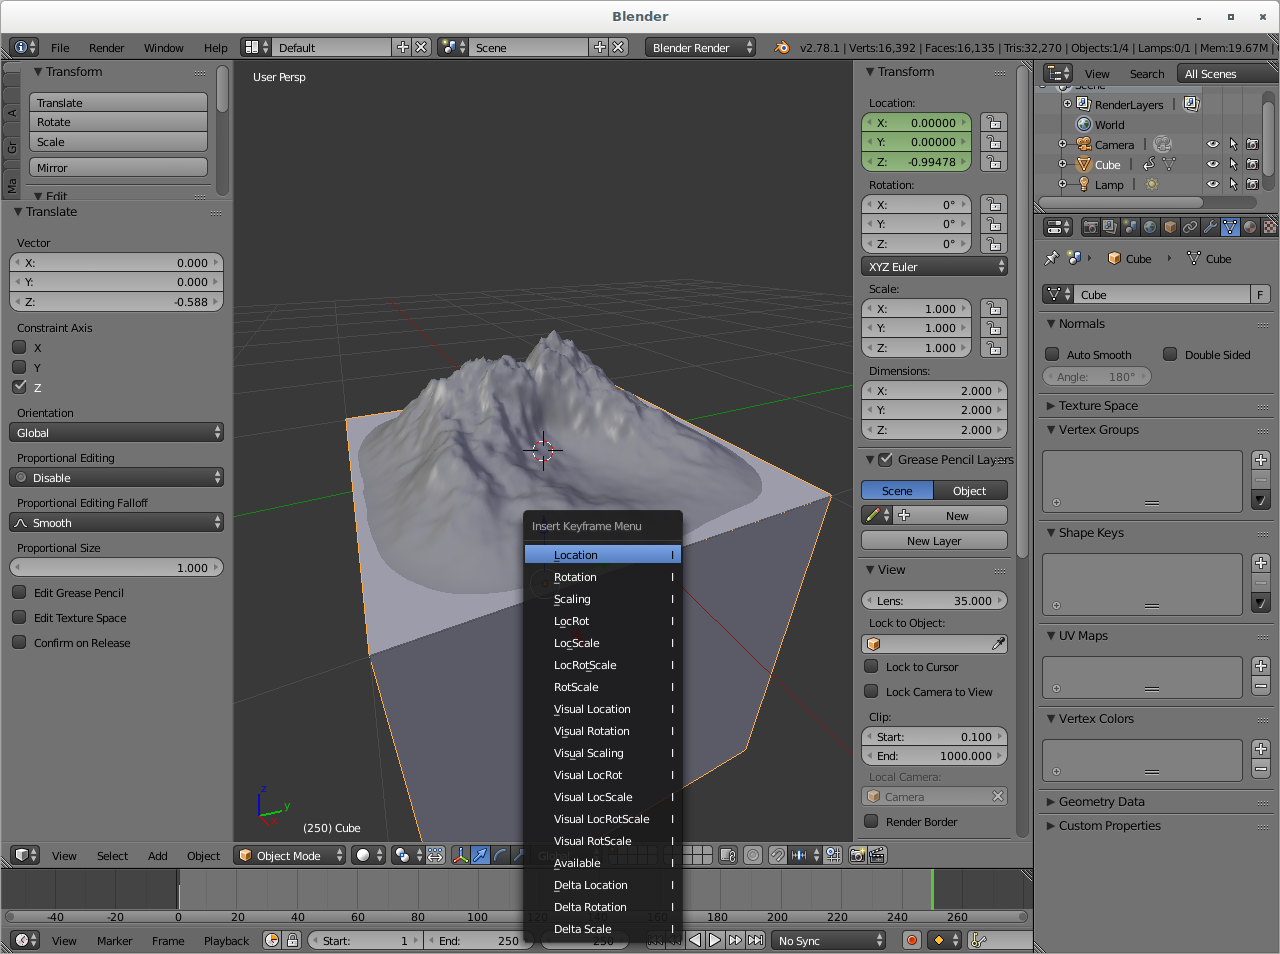
To simulate a fast ink spread on start which slows down as it grows, go to the "curve" window and change the tangent on the Z location curve (v v, for instance to switch to "vector". Alternatively you can move the tangent with the mouse to fit your taste.)
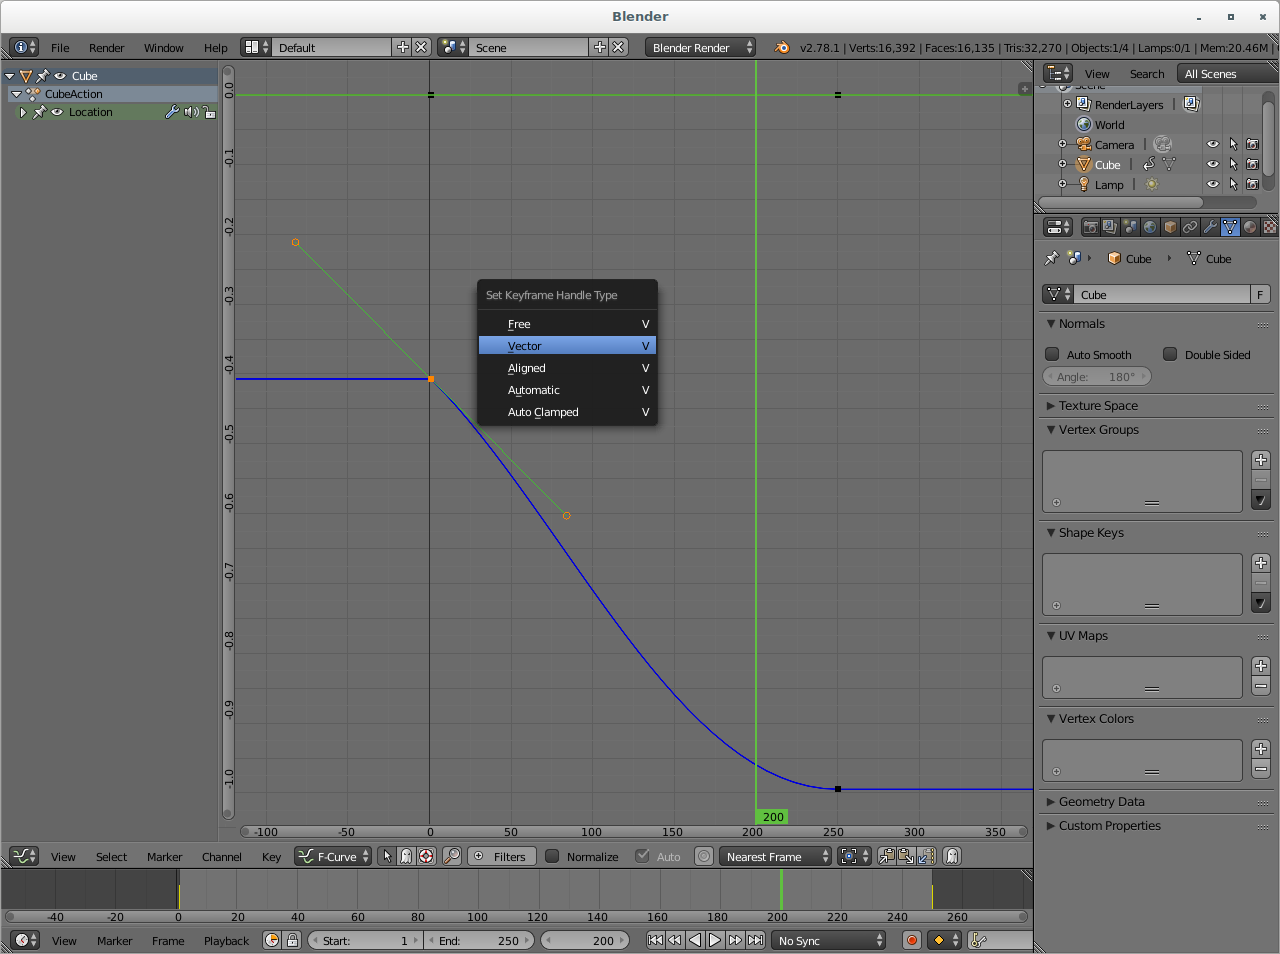
Check your animation (ALT-a) and how your cube reveal your terrain progressively.
Materials
Let's keep it simple. Assign a pure white on your cube and a pure black on your terrain for instance. For both, in the material, click on "Shadeless" in the "Shading" session, still for our 2D looks.
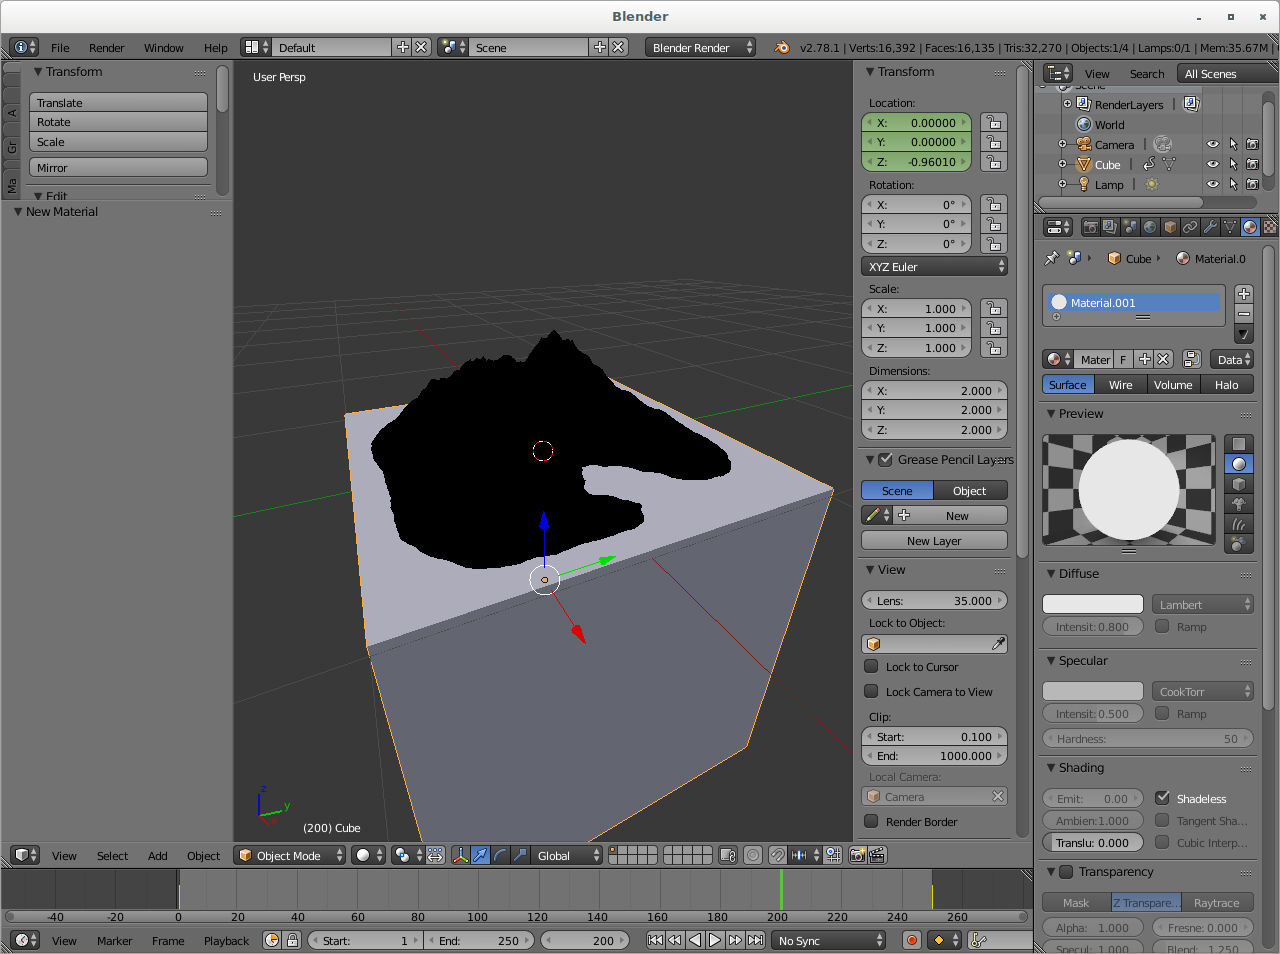
This simple material setup allows rendering preview in opengl and final renders in either blender internal or cycles engines.
Rendering
You're now ready to render your full animation. Pick your resolution, your destination format and let the electrons grind !
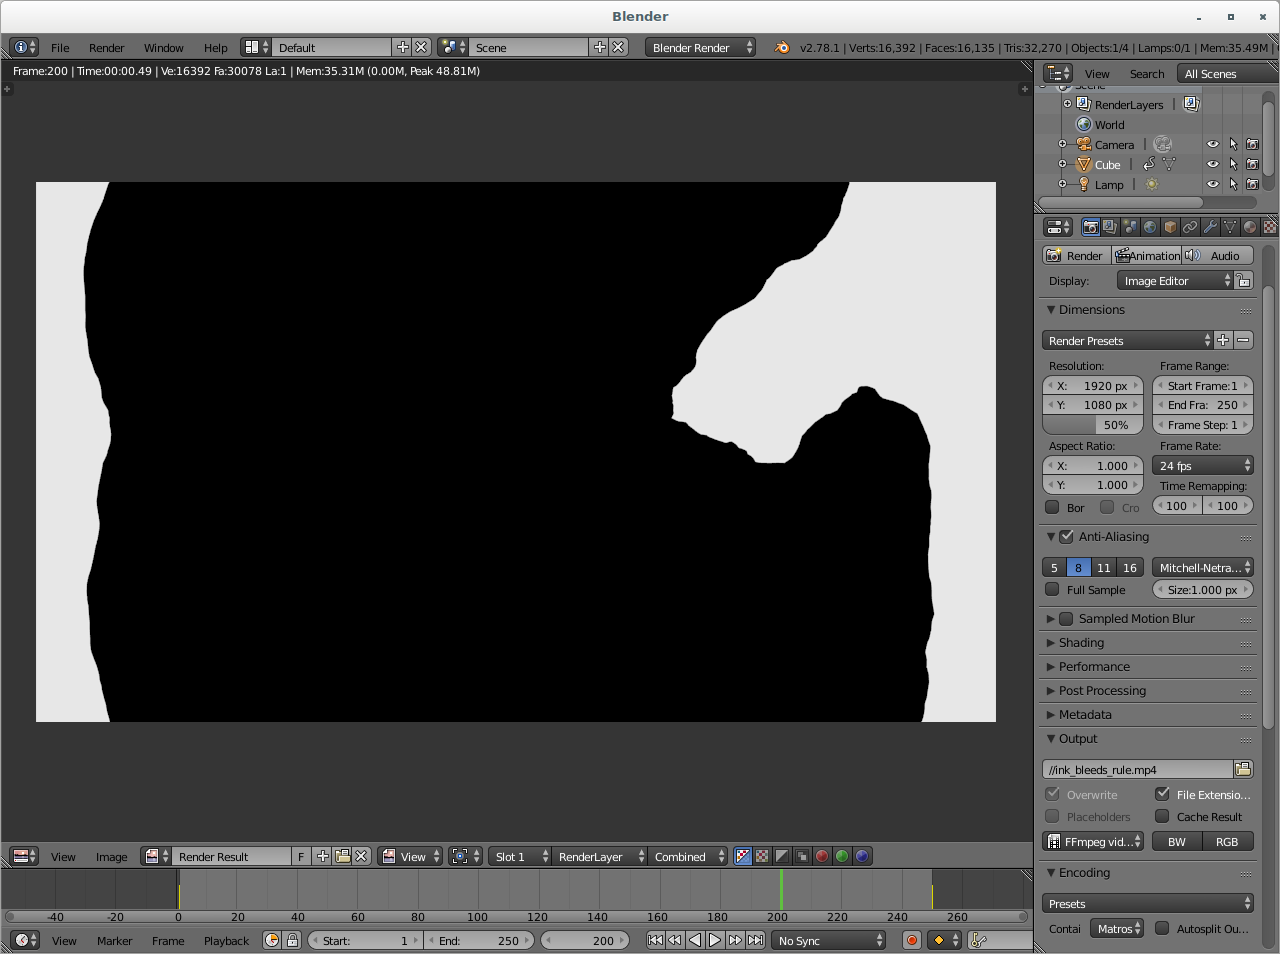
You can now use your ink bleed animation in blender VSE, standalone or as transition, or in other video editors.
But wait ! There's more ...
Advanced modelling
If you want a more customized ink bleed, here are some hints at how to generate them :
- Change the terrain "Type" to generate a different landscape profile
- Change the terrain "noise size" to generate a bunch of small ink sources (low noise size) or a single ink source (high noise size).
- Change the terrain "noise basis" to change the repartition of the spread (cellnoise gives interesting results).
- Use strata to create pulses in your spread.
- Change the random seed to keep the overall behaviour but change the shape of the spread.
- Use a different shape to hide the terrain (a sphere for instance).
- Use cycles to enable "ambient occlusion" shader on the hiding element for having some fringing/blurring during the growth.
- Use the compositor to add a feather filter and/or colorize the result to create some ink diffusion feeling to your animation.
- Animate the camera
Final words
I hope you found this little trick useful. Feel free to ask for clarifications, comment on improvements and share your interpretation of ink bleeds.